Here is a guide to fitting load bars on a hard-top cover for an Erde trailer.
First of all you will have to reinforce the body panels of your trailer so they can handle the extra weight. The example we are using is an Erde 142, please be aware that this process may vary slightly from trailer to trailer.
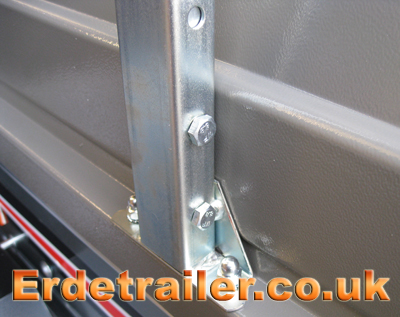
On an Erde 142 you will have to remove the two bolts from each side of the front panel that fasten it to the side panels. When they have been removed, insert this reinforcement bar between the two panels. This will be a tight fit, but the bar should reach all the way down to the bed of the trailer. See the example below.
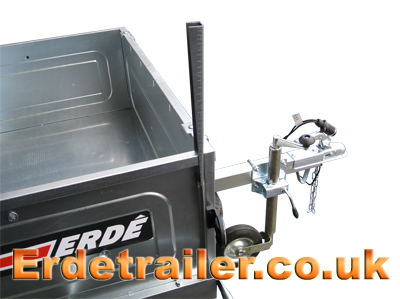
When you have this bar is position you will need to repeat this process on the other side of the trailer. When both reinforcement bars are in place, replace the four bolts removed from the front panel.
*Important* If you are fitting load bars directly to your trailer and are not using a hard-top cover, there is no need to modify any fittings or drill any holes. In this instance the load bars base fittings will clamp over the lip of the side panels.
When mounting load bar base fittings to a hard-top cover, it is easier to start at the rear of your trailer. This is because the front fittings will require some modifications if being installed to an Erde 142 model trailer or higher.
The frame of the hard-top cover has pre-drilled holes ready for a set of load bars. You will have to drill through the ABS plastic of the cover though, as this does not come pre-drilled. This is so the cover remains waterproof for those who don’t want load bars. The easiest way of drilling these holes is to drill through the holes in the frame and out through the plastic. This way you will know that you are drilling in the correct place.
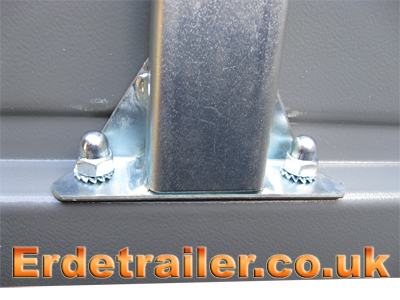
When fitting the front load bar to a hard-top cover for a 142 trailer model or higher, you will need to re-position it if you wish to fit cycle carriers. This is due to the location of the pre-drilled holes in the cover. Using the original holes for the front load bar causes the frame clamp of the cycle carrier to be mounted too far forward, as a result your bicycle’s front wheel will overhang the rail of the carrier.
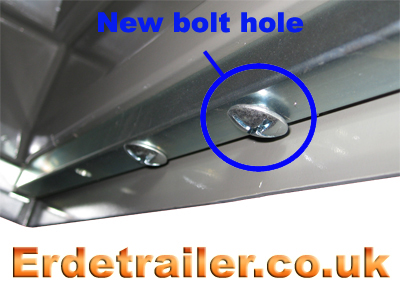
To fix this you will have to move the front load bar back slightly so it is only using one of the original bolt holes. A new hole will need drilling through the frame further back so you can fully attach the load bar. See the example below.
Now all of the base fittings are in place you can slot the two halves of each load bar together and mount them in their bases.
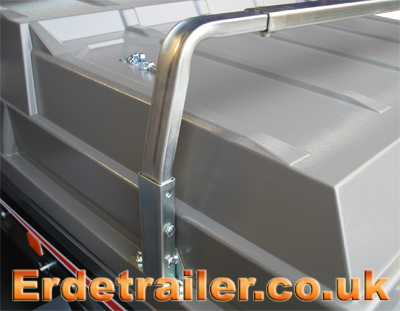
When the load bars are in place, bolt them into their bases.
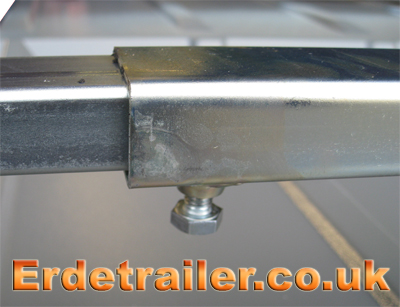
This bolt locks the two halves of the load bar together, leave this loose until you have both ends of the load bar in place.
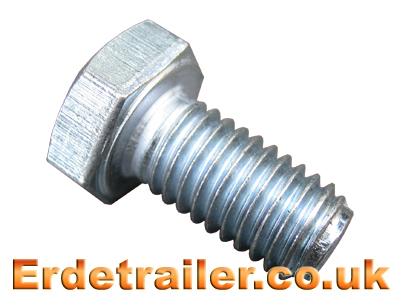
Tighten the bolt here when both ends of the load bar have been fixed into their bases.
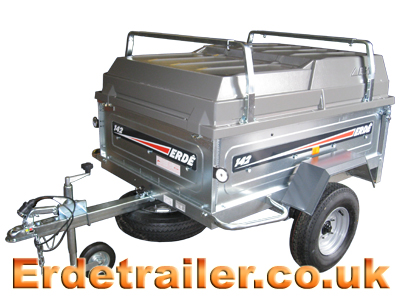
Load bars improve the versatility of your trailer by giving you a platform to mount additional accessories such as bicycle rails or roof boxes. Goods can also be transported on the load bars as long as they are properly secured you are not exceeding the bars maximum weight of 75kg. Please be aware of your trailers maximum gross weight when loading additional items on to load bars and roof boxes.
To purchase Erde trailer accessories, including load bars, please visit our website – towingandtrailers.co.uk

Back to Top |
Comments Off on Load bar fitting guide for an Erde hard-top cover
Here is a guide to fitting a hardtop cover to an Erde 142 trailer.
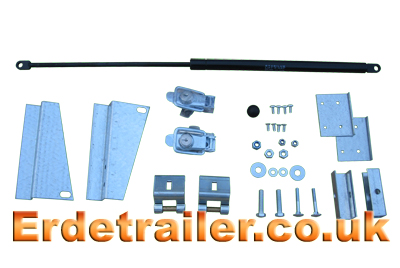
Below is everything you will need from the hard-top kit. There are some pieces in the kit that are used when fitting this cover to other models of Erde trailer. When fitting it to a 142 trailer however, you will only need what is shown below.
There are pre-drilled holes at each side of the top edge of the front panel. These holes may be covered by plastic studs that should be removed before fitting the hard-top cover. Remove all plastic studs even though you will only be using the two outer most holes.
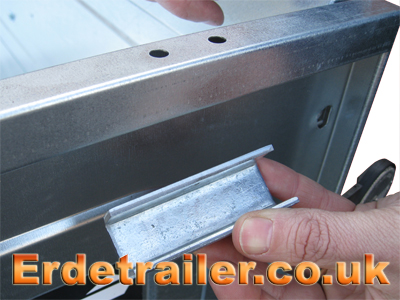
Slot this reinforcement bracket under the lip as shown below:
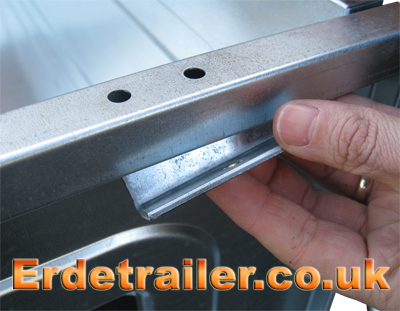
Then like this:

Now the reinforcement bracket is in position, a reinforcement plate must be fitted to the corner of the front panel. Before fitting this plate you will need to remove the bolts on the left and right of the front panel that connect it to the side panels. This is because the corner reinforcement plates share the same bolts.
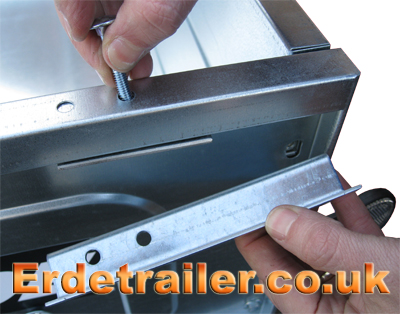
When you have the corner plate in place it should look like this:
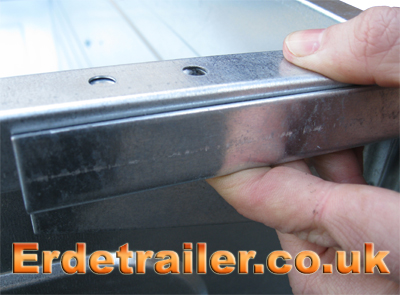
Place the hinge bracket over the two plates and use the large dome headed bolt to secure all three parts.

Tighten this bolt from below.
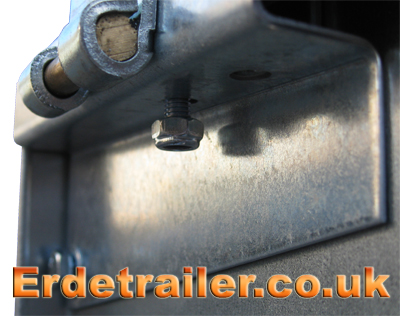
Replace the bolt that fastens the front panel to the side panel and repeat all processes up to this point for the other hinge.
Next, fit a latch to the outer edge of both rear corner posts of the trailer. These keep the hard-top securely shut and are fitted using 4 screws and a mounting plate each.
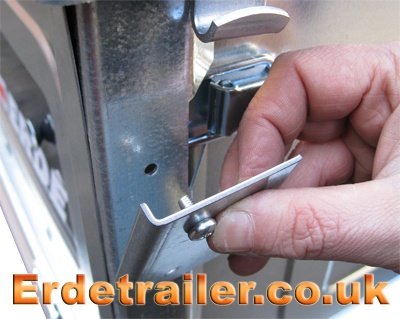
Now fix the latch onto the mounting plate.
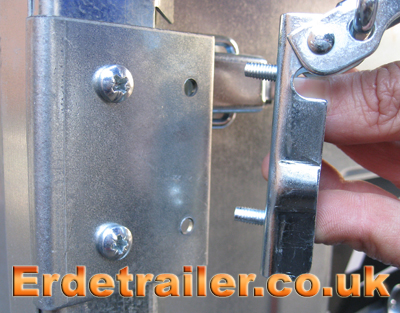
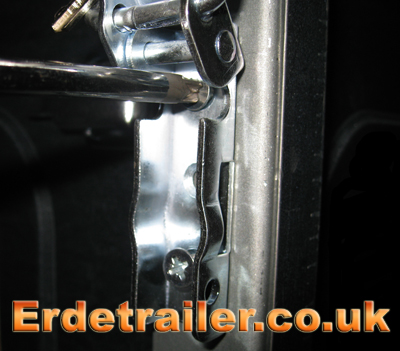
Tighten these screws with a Phillips screwdriver.
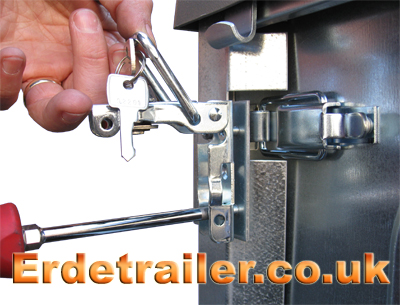
Erde’s hard-top covers have a gas ram or damper to keep the cover open while the trailer is being loaded. This mounts onto a large bolt through either one of the trailers side panels. Just remove the plastic stud from the body panel and insert the bolt on the side you wish to mount it.
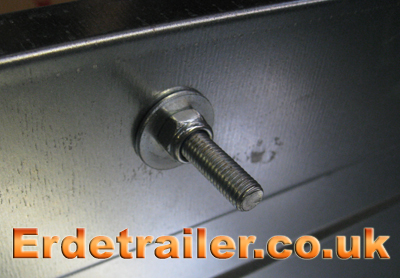
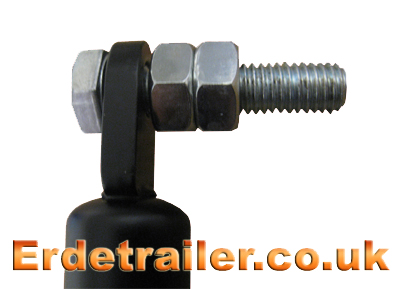
The other end of the gas ram fixes to the hard-top cover. To correctly attach it to the cover you must prepare a bolt as show below. Remember to leave enough slack so the damper can move on the bolt slightly, do not tighten it up fully.
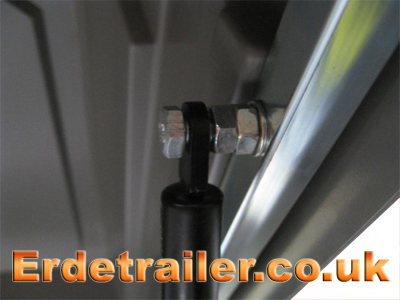
On the inside of the cover you will see threaded holes on both sides of the frame. Bolt the gas ram to the cover on the same side that you fitted the bolt through the body panel.
Now you are ready to mount the cover on its hinges. To do this, pick the cover up upside down and keep it horizontal while you hook the hinges together. This requires two people as you can easily bend or damage the hinges attempting this alone.
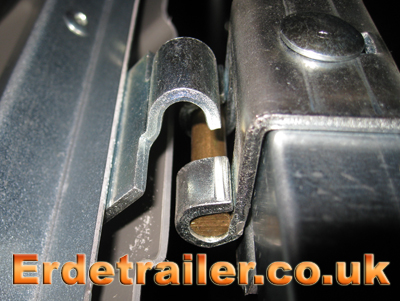
When the hinges are hooked together the cover must be lifted all the way over vertical, and then lowered into its normal position. Be careful not to bend the hinges while doing this as it can cause the cover to fit poorly.
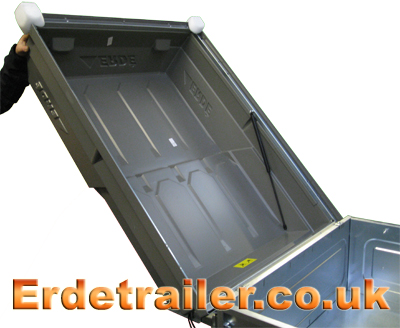
Finally, connect the gas ram to the bolt you prepared earlier on the inside of the trailer. A plastic thumb nut is supplied for this to make it easy to fit/remove.
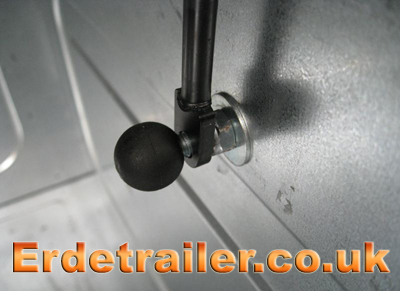
After fitting the gas ram, check that the hardtop is correctly positioned and can open and close without problems. Make sure the latches that have been fitted to the rear corner posts are working properly and securely clamp the cover shut.
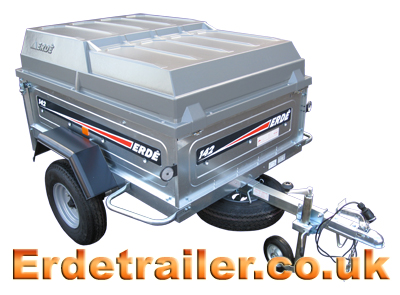
For a wide selection of Erde accessories, including hard-top covers please visit our website:

Back to Top |
Comments Off on Erde 142 hard-top fitting instructions
Assembly instructions for an Erde 142 trailer kit

We find that some people have problems following the instructions Erde supply with their trailers. To make this easier we have put together our own illustrated instructions for assembling Erde trailers.
Tools needed:
10mm spanner/socket.
13mm spanner/socket.
17mm spanner/socket.
Flat-head screwdriver.
Socket extension.
Things to remember:
Do not fully tighten any bolts until all side panels and mudguards are correctly fitted. This is because you may need the extra slack in order to correctly position some parts.
Most nuts are captive nuts to speed up assembly.
Click on a number to quickly jump to a step.
1. Start with the floor pan upside down, fit the side reinforcement bars and axle.
2. Fit the drawbar to the axle.
3. Attach the drawbar to the floor pan using the tipping bracket.
4. Fasten the light bar to the floor pan.
5. Attach the cables to the lights.
6. Fit the wheels.
7. Thumb tighten all bolts under the trailer.
8. Turn the trailer the correct way up.
9. Fit a side panel.
10. Fit the front panel.
11. Fit the other side panel.
12. Fit the tailgate.
13. Fit the mudguards.
14. Tighten all Bolts.
15. Fit front ‘nudge’ bars.
Please note: Due to vibration bolts can rattle loose, all bolts MUST be checked after 60 miles.
It is also recommended to check lights, couplings, wheels, and wheel bearings BEFORE every long journey.
1. Start with the floor pan upside down. Fit the side reinforcement bars and axle.
Before you can mount the axle there are reinforcement bars that must be pushed into each side of the floor pan.
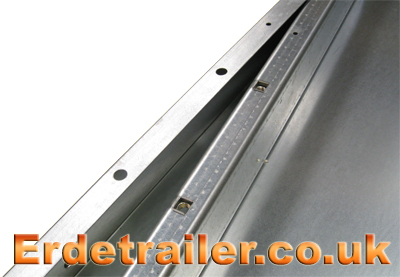
These bars also house the captive nuts used to fix the axle to the floor pan.

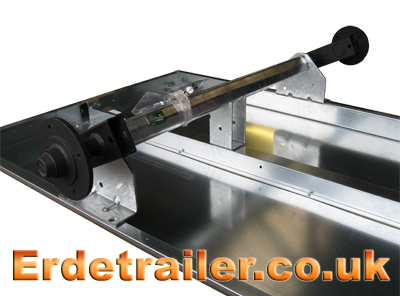
Now you can fit the axle to the floor pan. Do not completely tighten the axle bolts at this stage as you will need some extra slack to fit the body panels and mud guards.
2. Fit the drawbar to the axle.
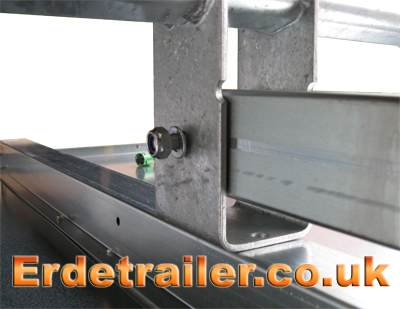
Remove the large bolt from the end of the drawbar. Thread the two coloured wires through the drawbar before slotting the drawbar into the centre support of the axle. The large bolt from the drawbar passes through both parts and is secured with a lock nut. You will need a 17mm spanner and socket to tighten this.
Remember this is the pivot point for the trailers tipping feature, so don’t over tighten it.
3. Attach the drawbar to the floor pan using the tipping bracket.
The tipping bracket must be fitted to the underside of the floor pan as shown below. At the centre point of the front edge are pre-drilled holes where it mounts. A 17mm socket/spanner is required for this.
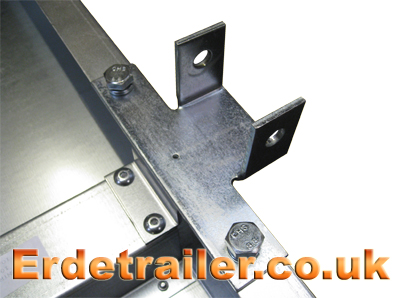
A pin through the tipping bracket holds the floor pan and drawbar together. This is secured with an R-clip.
4. Fasten the rear light bar to the floor pan.
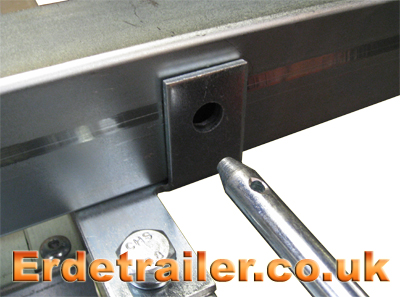
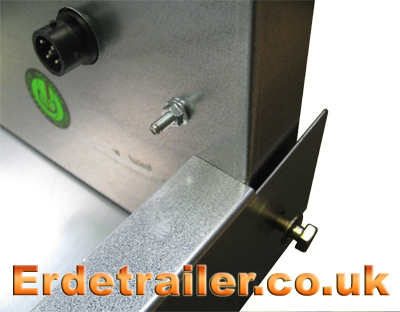
It helps to fit the rear light bar at an angle and then straiten it up when you get it into the correct position. Insert the two bolts that secure the light bar, one on each side. It is important that these bolts are left thumb tight for now as you will need the extra slack to position the side panels.
5. Attach the cables to the lights.
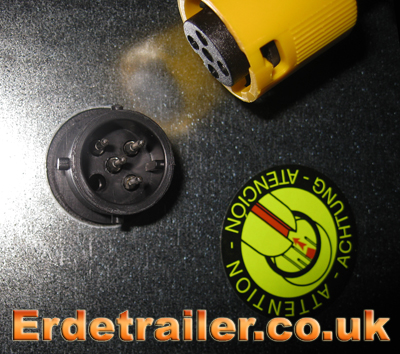
Attach the colour coded cables to the corresponding sockets on the reverse of the rear light bar. Slot the cables into the sockets and then twist the coloured sheath clockwise to lock it in place. The cable will only slot into the socket in one direction, so line up the pins and don’t force it.
6. Fit the wheels.
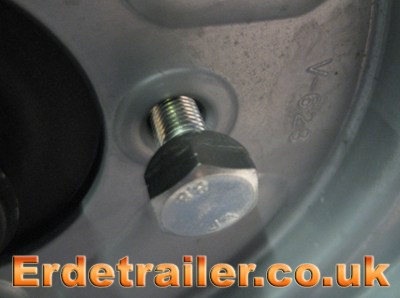
On this model of trailer the wheel nuts are actually stud bolts. To tighten these bolts evenly, work your way around the wheel tightening opposite bolts until you arrive at the first bolt again.
7. Thumb tighten all bolts under the trailer.
8. Turn the trailer the correct way up. This will require two people.
9. Fit a side panel.
It is best to mount side panels at the back first, and then lower the front into position. The easiest way of doing this is to locate the small stud on the rear of the side panel. There is a small hole on both sides of the light bar, one for each panel. Hook this stud into the hole before lowering the side panel into position.
While the rear of the side panel is ‘hooked’, lower the front of the panel into position.
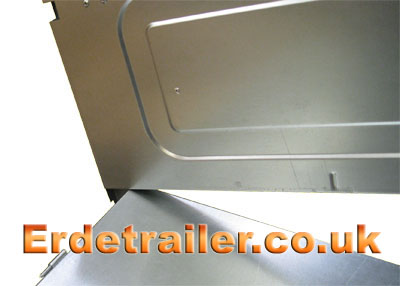
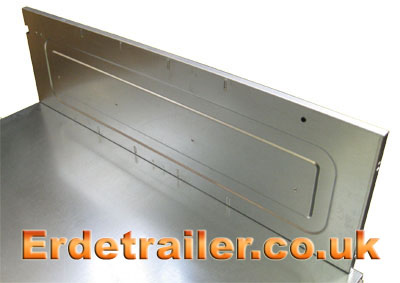
A 13mm bolt at the front and rear of the side panel will hold it in place. A smaller 10mm bolt must also be fitted underneath the rear edge where the side panel hooks into the light bar.

10. Fit the front panel.
Slot the front panel into place, do not bolt it down completely at this stage.
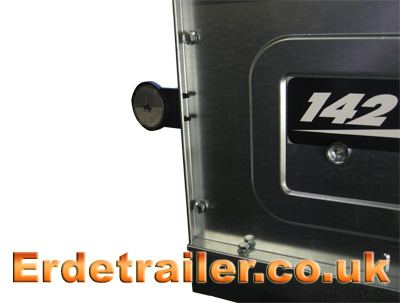
11. Fit the other side panel in the same way as before.
12. Fit the tailgate.
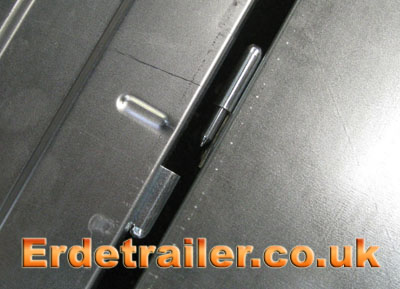
The tailgate hinge simply slides together.
13. Fit the mudguards.
Remember to fit the mudguard reinforcement plates. These prevent bolt heads from pulling through the thin metal of the mudguards.
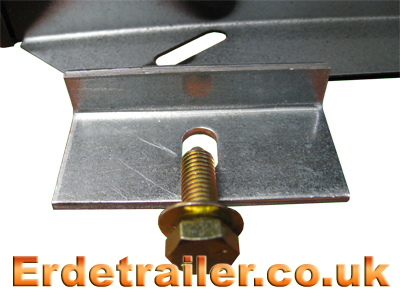
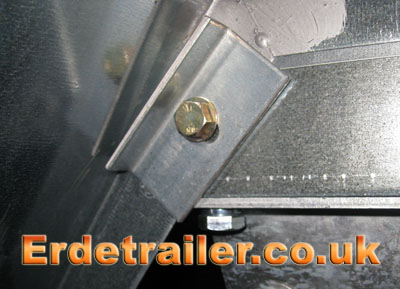
The mudguards mount onto pre-drilled holes in the side of the floor pan, located just above the wheels. A 13mm socket and extension is needed to reach these bolts.
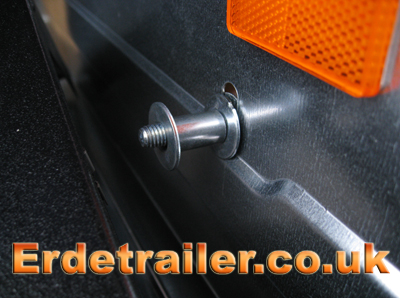
On this model of trailer there is an extra bolt securing the mudguard to the trailer. It passes through the side panel from the inside of the trailer, and has a small washer and spacer arrangement to fill the gap between the side panel and mudguard. This bolt tightens into a captive nut on the inside of the mud guard.
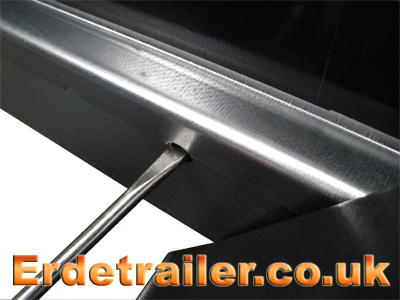
If you are having trouble with nuts and bolts not lining up, try using a screwdriver in the bolt hole to lever the panels into position. This is why most bolts should be left thumb tight until this stage.
14. Tighten all Bolts.
Start with the body panels and mud guards. Make sure all bolts are tight and these parts are secure.
To reach the axle, tipping bracket and drawbar bolts the trailer must be stood on end. Don’t worry about breaking the rear lights, they are recessed so the trailer can be stored this way.
To lift the trailer into this position it will require two people.
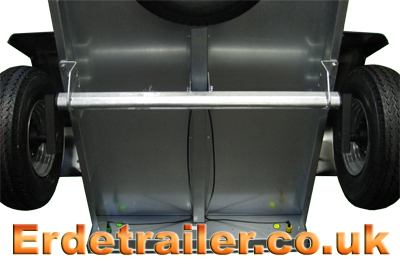
Tighten the axle bolts with a 17mm socket. You may also need a socket extension to reach past the wheels.
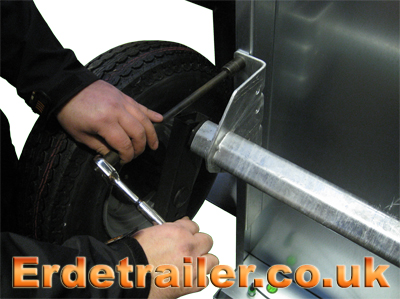
Tighten the drawbar bolt. This requires a 17mm socket and ring spanner.
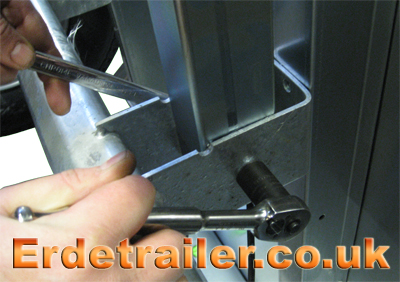
Make sure the tipping bracket is secure. If you have fitted a spare wheel holder you may not be able to use a ratchet in this small space. A 17mm ring spanner will work fine.
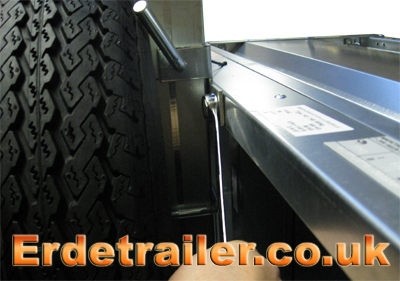
15. Fit the front ‘nudge’ bars.
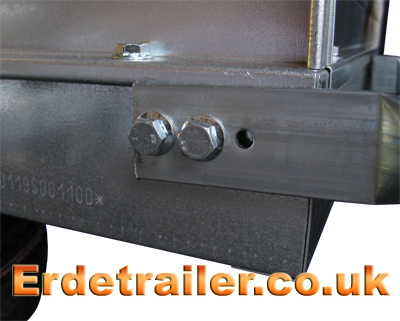
Three bolts hold each of these bars in place. One on the side…
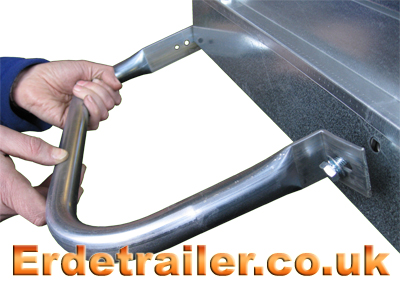
…and two on the front.
Again, remember to perform a thorough check of all nuts, bolts, wheels, bearings and lights after the first 60 miles. Vibrations can cause slackening of nuts and bolts in new trailers, so it is very important you perform this check.

For a large selection of Erde trailers and accessories please visit our main website – towingandtrailers.co.uk

Back to Top |
Comments Off on Assembly instructions for an Erde 142 trailer
Erde waterproof high-covers are quite simple to install. Here is a set of fitting instructions to help simplify it further.
First of all you should remember that the 102, 122 and 142 are slightly different to the rest of the Erde range. The 143 model trailer and above have black plastic caps covering holes in each of the trailers corner posts, this is where the frame of the high cover is slotted. You should be able to remove these by hand, if not, use a screwdriver to pop them out.
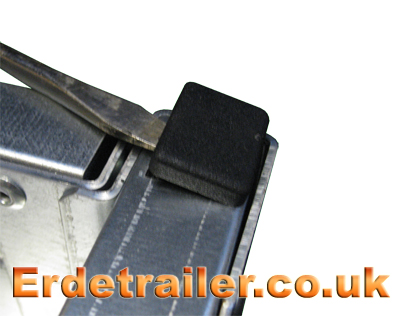
Trailer models 102, 122 and 142 do not have these plastic caps because the frame of the high cover actually sits on top of each corner of your trailer. The frame is held in place by the weight of the cover itself and the elastic cord that is stretched over all of the lashing points around the outside of the trailer.
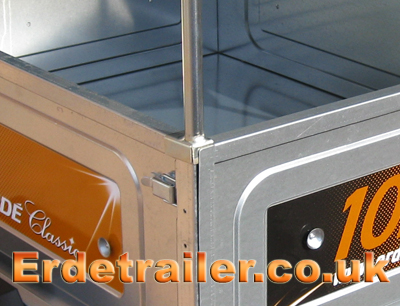
The curved sections of frame are the main front and rear pieces, this is the same for all Erde trailer models. On the 143 trailer model and higher, insert one of these sections into the trailers two front corner posts. It is important to remember that there is a crease on each end of these sections that must face into the centre of the trailer.
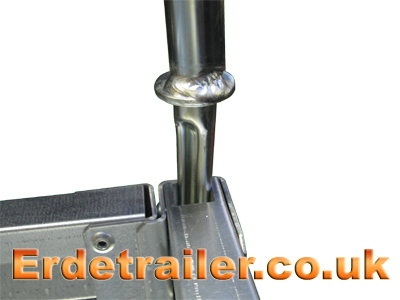
When the front section of frame is in place it should look like this:
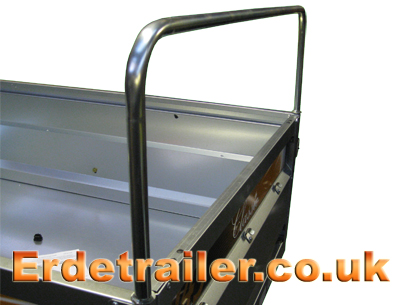
Now fit the rear section in the same way.
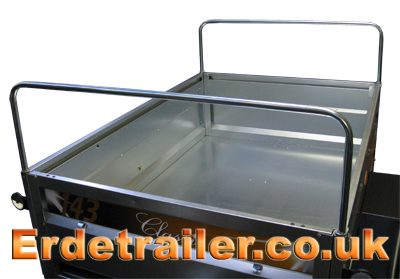
The front and rear sections of frame have two small slots along the top edge, this is where the side support pieces connect. Fit them now by slotting the flat ends of the side pieces into the front and rear sections of the frame. See the example below:
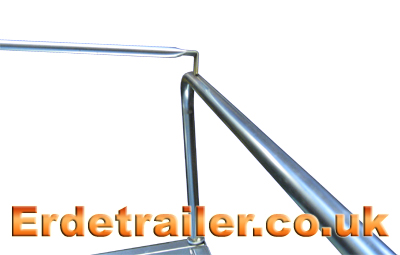
When you have fitted one side piece, fit the other in the same way. The frame should now be complete.
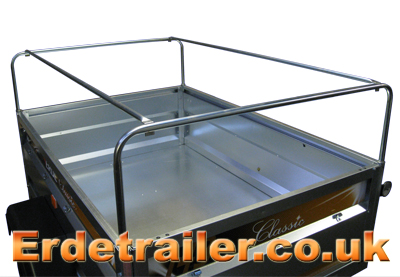
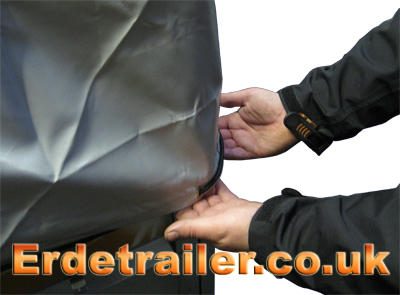
Unfold the waterproof cover and lay it on top of the frame. Using two hands, work your way around the trailer pulling the cover down over each corner.
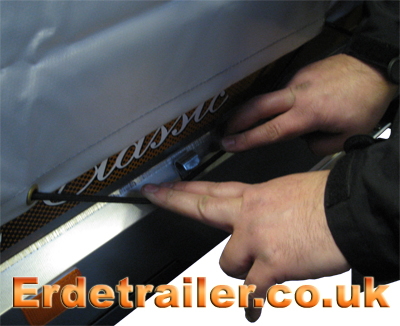
Finally, hook the bungee cable from the cover over each one of the hooks around the outside of your trailer.
The waterproof high cover should now be complete and safely secured to the trailer. This whole process can be done in a couple minutes and should not require any tools.
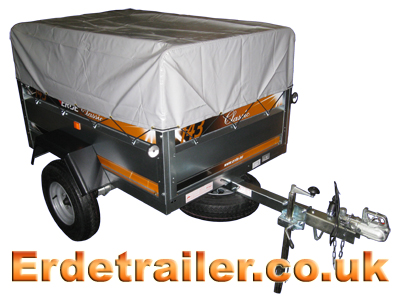
Erde waterproof covers are supplied in two heights, 30cm and 60cm. The fitting process is the same for both.
For a wide selection of Erde accessories, including waterproof high-covers, please visit towingandtrailers.co.uk:

Back to Top |
Comments Off on Erde waterproof high-cover fitting instructions
Here is a guide to replacing a standard coupling head with a ‘triple lock’ style coupling on a 50mm box section drawbar.
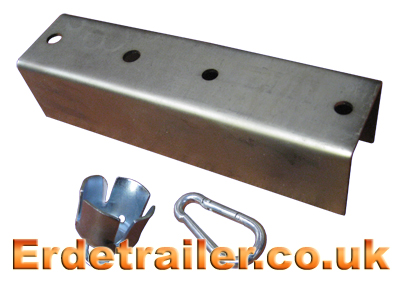
Below is a triple lock head kit. This comes with all the nuts and bolts needed to fit it, but there are a few other things you will also need.

You will need this drawbar adaptor plate, plug holder and carabiner. The drawbar adaptor is used because the hole centres of the triple lock head do not quite match up with those in the drawbar from the original head. This adaptor saves you from having to re-drill holes in the drawbar.
First of all, remove the two bolts on top of the old coupling that hold it onto the drawbar. You will notice that the small triangle shaped stand and length of chain (secondary coupling device) will also come away from beneath the drawbar when these bolts are removed.
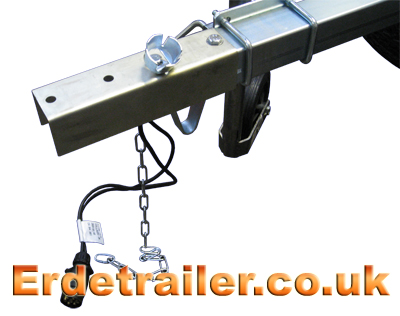
Using the two bolts from the original head connect the drawbar adaptor to the drawbar. Re-fit the triangle shaped stand and secondary coupling device using these bolts as well.
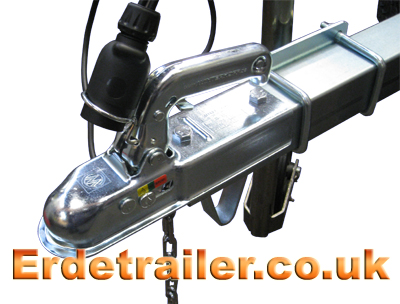
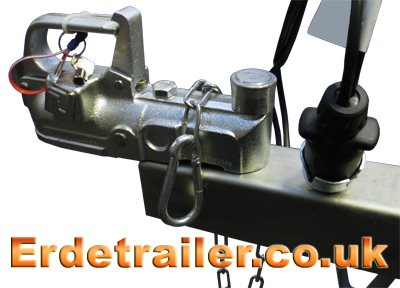
You will notice in the example below that a plug holder has been fitted using one of these same bolts. A plug holder is a legal requirement in the UK and so you must remember to fit one.
You must also remember to only attach one end of the chain when re-fitting it. This secondary coupling device is also a legal requirement in the UK, so you must remember to re-fit this too.
Place the triple lock head on the drawbar adaptor. Two bolts connect the new head to the drawbar much like the original, except one of these bolts is about to be secured in such a way it can only be removed with a grinder.
In the example below you can see that the rear bolt is protected by a security device. A thin walled socket is required to tighten this bolt as a regular one is too thick to fit inside the ‘cup’ shaped device.
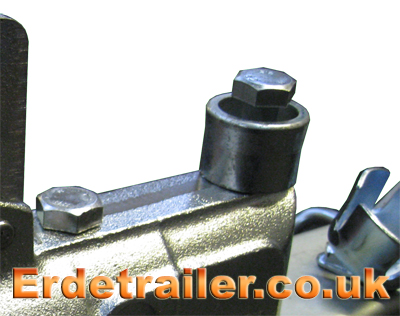
After tightening the protected bolt, a small disk of metal is hammered into the top of the security device to seal it. This metal disk has tapered edges to make it easier to hammer in.
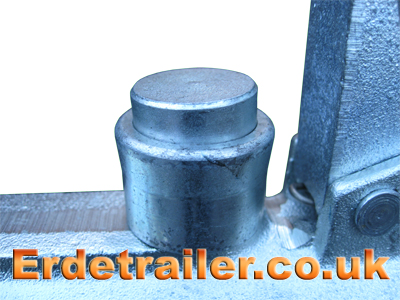
The only way to remove this now is to cut through it using a grinder to reveal the bolt inside.

Finally, you must attach the carabiner to the loose end of the chain. Normally both ends of this chain would be attached to the drawbar, leaving a loop that could be hooked over the tow ball. This head requires a drawbar adaptor though, so the length of chain is no longer long enough. The carabiner allows you to thread the chain around the tow ball and then clip it back onto itself where convenient.
To purchase trailer parts and accessories, including replacement couplings, please visit towingandtrailers.co.uk :

Back to Top |
Comments Off on Triple lock towing head fitting instructions
Here is a fitting guide for lightweight Erde jockey wheels.
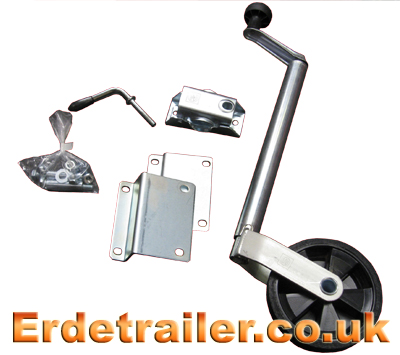
When building a trailer from scratch you may find it easier to fit the jockey wheel while the trailer is upside down. If you are fitting a jockey wheel to a complete trailer, we recommend supporting the towing hitch on something to lift the front of the trailer of the ground. This should make the drawbar easier to work on.
First of all you will need to assemble the bracket that fastens the clamp to the drawbar.
This bracket is made up of two plates. A larger plate, shaped with a 50mm deep fold that fits around the trailers drawbar, while the other has a smaller 10mm deep fold allowing the clamp to be expanded to fit 60mm drawbars if necessary.
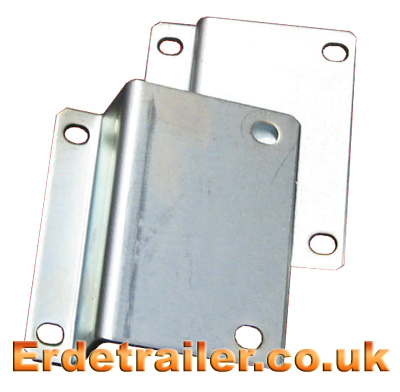
If being fitted to a 50mm drawbar, place two short bolts through the pre-drilled holes in the folded side of the larger plate. These bolts must be facing out from the fold as the smaller plate bolts to it. Bolt the larger plate to the flat end of the smaller plate, making sure that the fold in the smaller plate faces out.
If your trailer has a 60mm drawbar, turn the smaller plate over so that it is bolted to the larger plate ‘fold to fold’ like the example below. This will give you the extra 10mm you need to fit a larger drawbar.
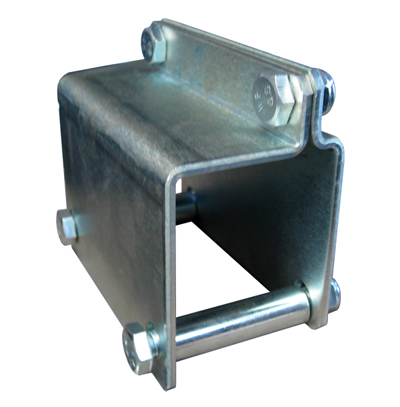
The example below is a 50mm drawbar.
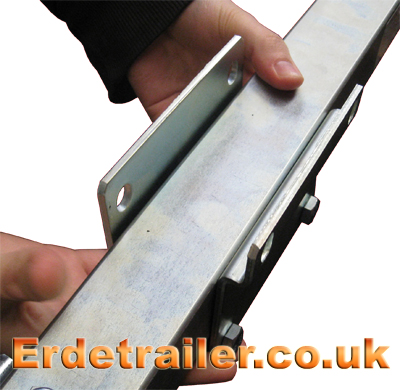
After you have positioned this bracket in suitable place, insert two large bolts and spacers to hold the bracket in place. Do not apply nuts to these bolts just yet as the jockey wheel clamp must also be fitted to them.
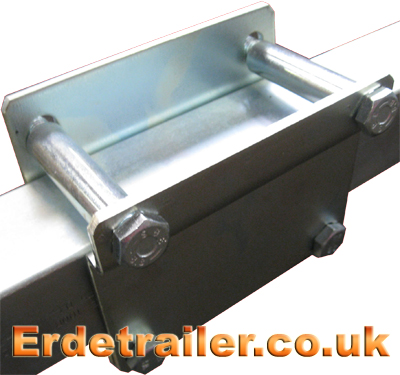
Slot the wheel clamp onto the ends of these large bolts and secure both bracket and clamp with the same nuts.
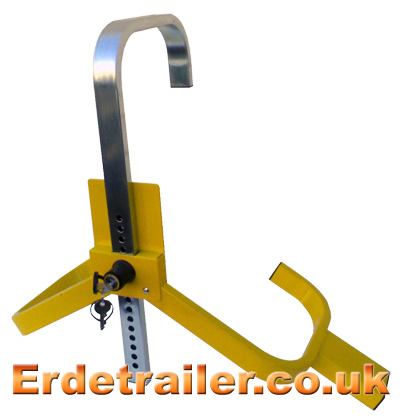
Finally, fit the jockey wheel in the clamp and tighten it up.
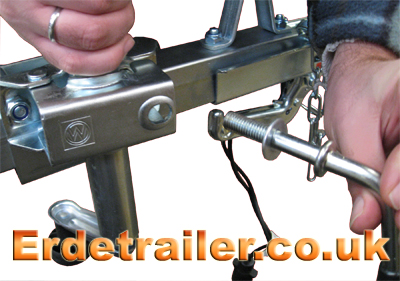
Some jockey wheels can be wound up with a handle, others require the clamp to be slackened and then raised manually. Do not forget to raise your jockey wheel when you begin a journey as they do not last long if left down.
For a large selection of Erde accessories, including jockey wheels, please visit our website:

Back to Top |
Comments Off on Erde lightweight jockey wheel fitting instructions
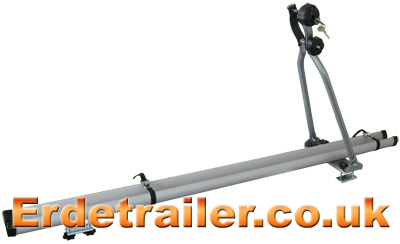
Erde cycle carriers mount on the load bars of your trailer or to the roof rack of your car, providing an excellent way to safely transport bicycles. The cycle’s frame is supported by a padded clamp, while small straps around the rails keep the cycles wheels in place.
The clamp that supports the frame has a lock and key to prevent theft of cycles.
Good features of an Erde cycle carrier include:
- Can be fastened to your trailer load bars or car roof rack
- Built in clamp and extra straps to secure your cycle
- Built in lock to prevent theft
Bad features of an Erde cycle carrier include:
- Can be expensive as you will need the loadbars or roof rack to mount it on
- Cannot be mounted without loadbars or a roof rack
- Has a known problem when fitting to a CP150 hardtop cover (see below)
This accessory would be great for a camping trip or holiday.
*Important* Erde cycle carriers are mounted on the load bars on your trailer. The frame clamp of the cycle carrier shares the same bracket that secures the carrier to the front load bar. When Erde cycle carriers are fitted to a CP150 hardtop (suitable for the Erde 142, 143 and 153), this bracket is forced further forward due to the position of the load bars on this model of hardtop. This causes the front wheel of your cycle to overhang the carrier when it’s frame is clamped.
To correct this you must ignore the pre-drilled holes in the cover and move the front load bar 4 to 6 inches closer to the rear. You will be required to drill new holes in the hard-top in order to mount the load bar in a more suitable position. See this article on fitting trailer load bars for more information.
For a wide selection of towing and trailer related products including cycle carriers, please visit our website:

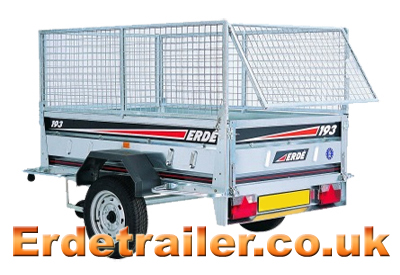
Erde manufacture mesh extension panels for trailer models 143 and above. These panels work in the same way as regular extension panels, except these are made of wire mesh instead of sheet metal.
Erde’s mesh panels are 60cm high and have an optional mesh cover that fastens to the top.
Good features of mesh panels include:
- Increases capacity of your trailer by around 150%
- Mesh extensions panels are lighter than regular extension panels
- Good for transporting animals and pets
Bad features of mesh panels include:
- Can be expensive
- Cannot be securely locked
Mesh panels are also ideal for transporting bulky materials like garden waste. This is an excellent way to increase the capacity and versatility of your trailer.
Back to Top |
Comments Off on Mesh extension panels and covers for Erde trailers
Here is a guide to fitting a hard-top cover to an Erde 122 trailer.
First you will need to reinforce the front body panel of your trailer. Take one of the reinforcement plates supplied with the cover, this will need to be slotted under the lip at the top of the front panel.
There should be pre drilled holes at each side of the top edge of this panel, they may be covered by plastic studs that should be removed. Remove all plastic studs even though you will only be using the outer most holes.
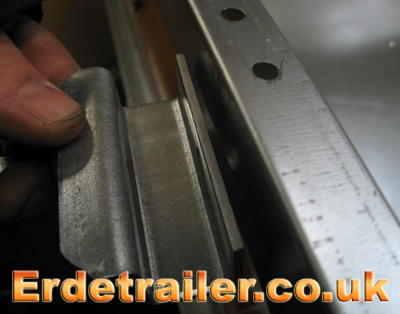
Slot this plate under the lip as shown below:
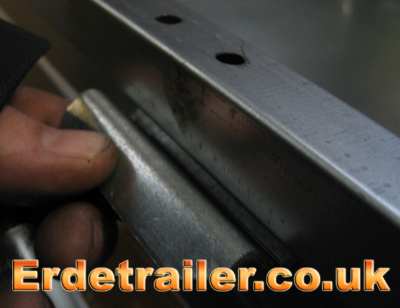
And then like this:

Now the reinforcement plate is in position the hinge plate is laid on top of it.
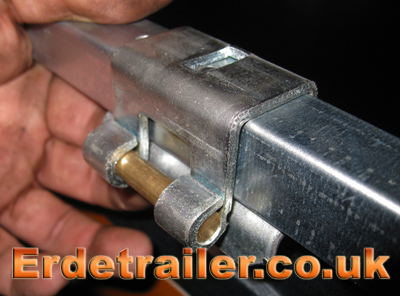
Use the large dome headed bolt to secure both parts of the hinge. Repeat for the second hinge.
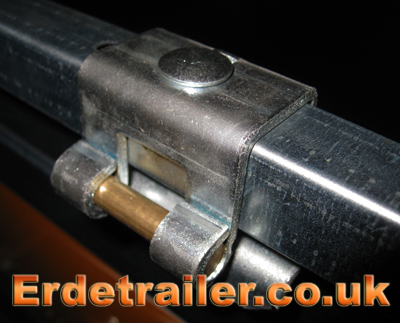
Next, fit two latches to the rear corner posts of the trailer to keep the hard-top securely closed. These are fitted to the outer edges of the rear corner posts using two screws each.
Erde’s hard-top covers have a gas ram or damper to keep the cover open while the trailer is being loaded. This mounts onto a large bolt through either one of the trailers side panels. Just remove the plastic stud from the body panel and insert the bolt on the side you wish to mount it.

The other end of the gas ram fixes to the hard-top cover. To correctly attach it to the cover you must prepare a bolt as show below:

On the inside of the cover you will see threaded holes on both sides of the frame, this is because the gas ram can be mounted on either side. Bolt the gas ram to the cover on the same side that you fitted the bolt through the body panel.

Now you are ready to mount the cover on its hinges. To do this, pick the cover up upside down and keep it horizontal while you hook the hinges together. This requires two people as you can easily bend or damage the hinges attempting this alone.

When the hinges are hooked together the cover must be lifted all the way over vertical, and then lowered into its normal position. Be careful not to bend the hinges while doing this as it can cause the hard cover to fit poorly.

Finally, connect the gas ram to the bolt you prepared earlier on the inside of the trailer. A plastic thumb nut is supplied for this to make it easy to fit/remove.

After fitting the gas ram, check that the hardtop is fitted correctly and can open and close without problems. Use the latches that have been fitted to the rear corner posts to securely clamp the cover shut.
For a wide selection of Erde accessories, including hard-top covers please visit our website:

Back to Top |
Comments Off on Erde 122 hard-top cover fitting instructions

Cargo nets are a great way of securing loose items inside you trailer at a fraction of the cost of a hard top cover. Erde manufacture a variety of sizes to fit all of their standard trailers in the ‘leisure’ or ‘commercial’ range.
Erde cargo nets are made from high quality elastic cord and heavy duty nylon netting. This type of cargo net is designed to specifically to stretch between the hooks that Erde trailers have on the outside of their body panels.
Good features of an Erde cargo net include:
- Much cheaper than a cover for your trailer
- Quick to fit and remove
- Folds up nicely and can be stored in a small space
Bad features of an Erde cargo net include:
- Does not come with any hooks. If your trailer does not have studs around the body panels for nets or straps, this net may not work for you
- Unlike a trailer cover, cargo nets are not waterproof
- Cargo nets cannot be locked
For a wide selection of Erde accessories including straps and cargo nets, please visit our website:

Back to Top |
Comments Off on Cargo nets for Erde trailers


